[Flutter]

import 'package:flutter/material.dart';

void main() => runApp(MyApp());

class MyApp extends StatelessWidget {
  @override
  Widget build(BuildContext context) {
    return MaterialApp(
      title: 'Welcome to Flutter',
      home: Scaffold(
        appBar: AppBar(
          title: Text('Welcome to Flutter'),
        ),
        body: Center(
          child: Text(
            'Hello World',
            style: TextStyle(fontSize: 30, fontFamily: 'DoHyeonRegular'),
          ),
        ),
      ),
    );
  }
}
[Flutter] 강좌 01 : Hello World 출력하기
[Flutter] 강좌 01 : Hello World 출력하기
Flutter를 이용하여 Hello Flutter World를 화면에 띄어보자. 처음에 Flutter의 New Project를 만들면 이런식으로 main.dart에 많은 글이 있을텐데.. 모두 다 지우자 ! 그리고 아래의 코드를 붙여넣기 하자. impo..
security-nanglam.tistory.com
[Flutter] 외부 Font 추가 및 변경 정리 "Google Font 이용"
[Flutter] 외부 Font 추가 및 변경 정리 "Google Font 이용"
[Flutter] import 'package:flutter/material.dart'; void main() => runApp(MyApp()); class MyApp extends StatelessWidget { @override Widget build(BuildContext context) { return MaterialApp( title: 'We..
security-nanglam.tistory.com
위의 포스팅에서 가져온 코드입니다! 이걸로 AppBar에 대한 모든 것에 대해 알아봅시다!
AppBar란 앱의 상단 제목 줄을 의미하는 단어입니다.
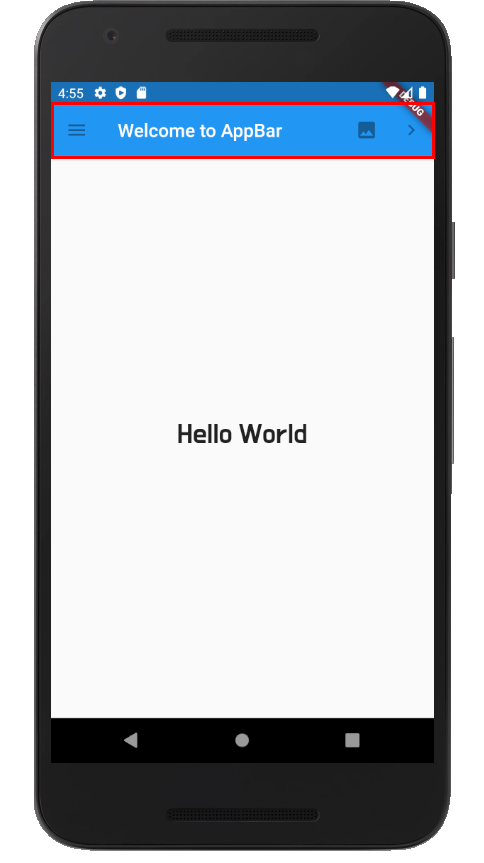
위 사진의 빨간 네모에 해당하는 부분입니다.
왼쪽부터 leading[Icons.menu], title["Welcome to AppBar"], actions[Icons.image, Icons.navigate_next]를 통해서 추가할 수 있습니다.
appBar: AppBar(
    title: Text('Welcome to AppBar'),
    leading: IconButton(icon: Icon(Icons.menu), onPressed: null),
    actions: [
        IconButton(icon: Icon(Icons.image), onPressed: null),
        IconButton(icon: Icon(Icons.navigate_next), onPressed: null),
    ],
)
Text를 중앙에 정렬시키는 방법은 centerTitle을 이용하면 됩니다.

appBar: AppBar(
    title: Text('Welcome to AppBar'),
    centerTitle: true,
    leading: IconButton(icon: Icon(Icons.menu), onPressed: null),
    actions: [
        IconButton(icon: Icon(Icons.image), onPressed: null),
        IconButton(icon: Icon(Icons.navigate_next), onPressed: null),
    ],
)
AppBar의 배경색을 변경하는 방법은 backgroundColor를 이용하면 됩니다.

appBar: AppBar(
    title: Text('Welcome to AppBar'),
    centerTitle: true,
    leading: IconButton(icon: Icon(Icons.menu), onPressed: null),
    actions: [
        IconButton(icon: Icon(Icons.image), onPressed: null),
        IconButton(icon: Icon(Icons.navigate_next), onPressed: null),
    ],
    backgroundColor: Colors.red,
)
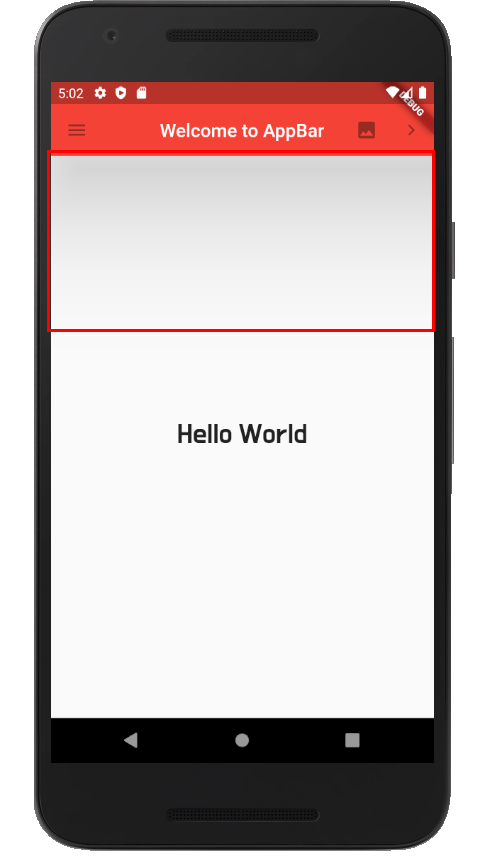
AppBar의 그림자 정도를 변경하는 방법은 elevation을 이용하면 됩니다.
(0이 가장 작은 값이며, 0으로 하면 그림자가 없습니다.)
appBar: AppBar(
    title: Text('Welcome to AppBar'),
    centerTitle: true,
    leading: IconButton(icon: Icon(Icons.menu), onPressed: null),
    actions: [
        IconButton(icon: Icon(Icons.image), onPressed: null),
        IconButton(icon: Icon(Icons.navigate_next), onPressed: null),
    ],
    backgroundColor: Colors.red,
    elevation: 100,
)
onPressed에 null이 아닌 다른 값을 넣어 버튼을 활성화할 수도 있습니다.
하단 AppBar에 대해 궁금다하면 아래 포스팅을 참고하면 좋을거 같습니다.
[Flutter] Bottom App Bars의 "모든 것"
[Flutter] Bottom App Bars 의 "모든 것"
[Flutter] 아래에 있는 AppBar는 Bottom App Bar라고 부릅니다..! 이 BottomAppBar를 만드는 법에 대해서 알아봅시다. 우선 BottomAppBar는 Material Design 중에 하나입니다. 사용방법은 Scaffold의 속성에 있는..
security-nanglam.tistory.com
'Language_ > Flutter' 카테고리의 다른 글
| [Flutter] Bottom Navigation Bar 의 "모든 것" (0) | 2020.09.30 |
|---|---|
| [Flutter] Navigator & Named Route"화면 전환의 시작" (9) | 2020.09.30 |
| [Flutter] 외부 Font 추가 및 변경 정리 "Google Font 이용" (0) | 2020.09.27 |
| [Flutter] 이미지 추가 & "unable to load asset" 에러 해결 (4) | 2020.09.27 |
| [Flutter] StatelessWidget & StatefulWidget 차이점 정리 (0) | 2020.09.26 |


댓글