[WillPopScope]
App 개발을 하다보면 취소키를 막고 싶은 경우가 있을 것이다.
이럴 때, WillPopScope를 사용하면 취소키를 눌러도 뒤로 가지 않는다.

사용 방법은 간단하다. Scaffold를 WillPopScope로 감싸주면 된다.
import 'package:flutter/material.dart';

void main() => runApp(
      MaterialApp(
        title: 'MyApp',
        home: MyApp(),
      ),
    );

class MyApp extends StatelessWidget {
  @override
  Widget build(BuildContext context) {
    return WillPopScope(
      child: Scaffold(
        appBar: AppBar(
          title: Text('Welcome to Flutter'),
        ),
        body: Center(
          child: Text('Hello World'),
        ),
      ),
      onWillPop: () {},
    );
  }
}
*onWillPop: null 이라 하면 WillPopScope가 동작하지 않는다.
또한 onWillPop을 통해 취소 버튼 눌렀을 경우 액션을 정할 수 있다.

import 'package:flutter/material.dart';

void main() => runApp(
      MaterialApp(
        title: 'MyApp',
        home: MyApp(),
      ),
    );

class MyApp extends StatefulWidget {
  @override
  _MyApp createState() => _MyApp();
}

class _MyApp extends State<MyApp> {
  String _text = "Hello World"; // 초기값
  @override
  Widget build(BuildContext context) {
    return WillPopScope(
      child: Scaffold(
        appBar: AppBar(
          title: Text('Welcome to Flutter'),
        ),
        body: Center(
          child: Text(_text),
        ),
      ),
      onWillPop: () {
        setState(() {
          _text = "Dont Touch Back Button";
        });
      },
    );
  }
}
물론 setState()를 사용하려면 StateFulWidget으로 만들어야 한다.
StatefulWidget과 StatelessWidget을 모른다면 아래의 포스팅을 참고하자.
[Flutter] StatelessWidget & StatefulWidget 차이점 정리
[Flutter] StatelessWidget & StatefulWidget 차이점 정리
Flutter의 Widget은 StatelessWidget(SLW)과 StatefulWidget(SFW)을 상속받아서 만들 수 있다. 또한, 두 위젯은 Scaffold를 이용해 동일한 방식으로 화면을 구성하게 된다. StatelessWidget은 단 한번만 Build를..
security-nanglam.tistory.com
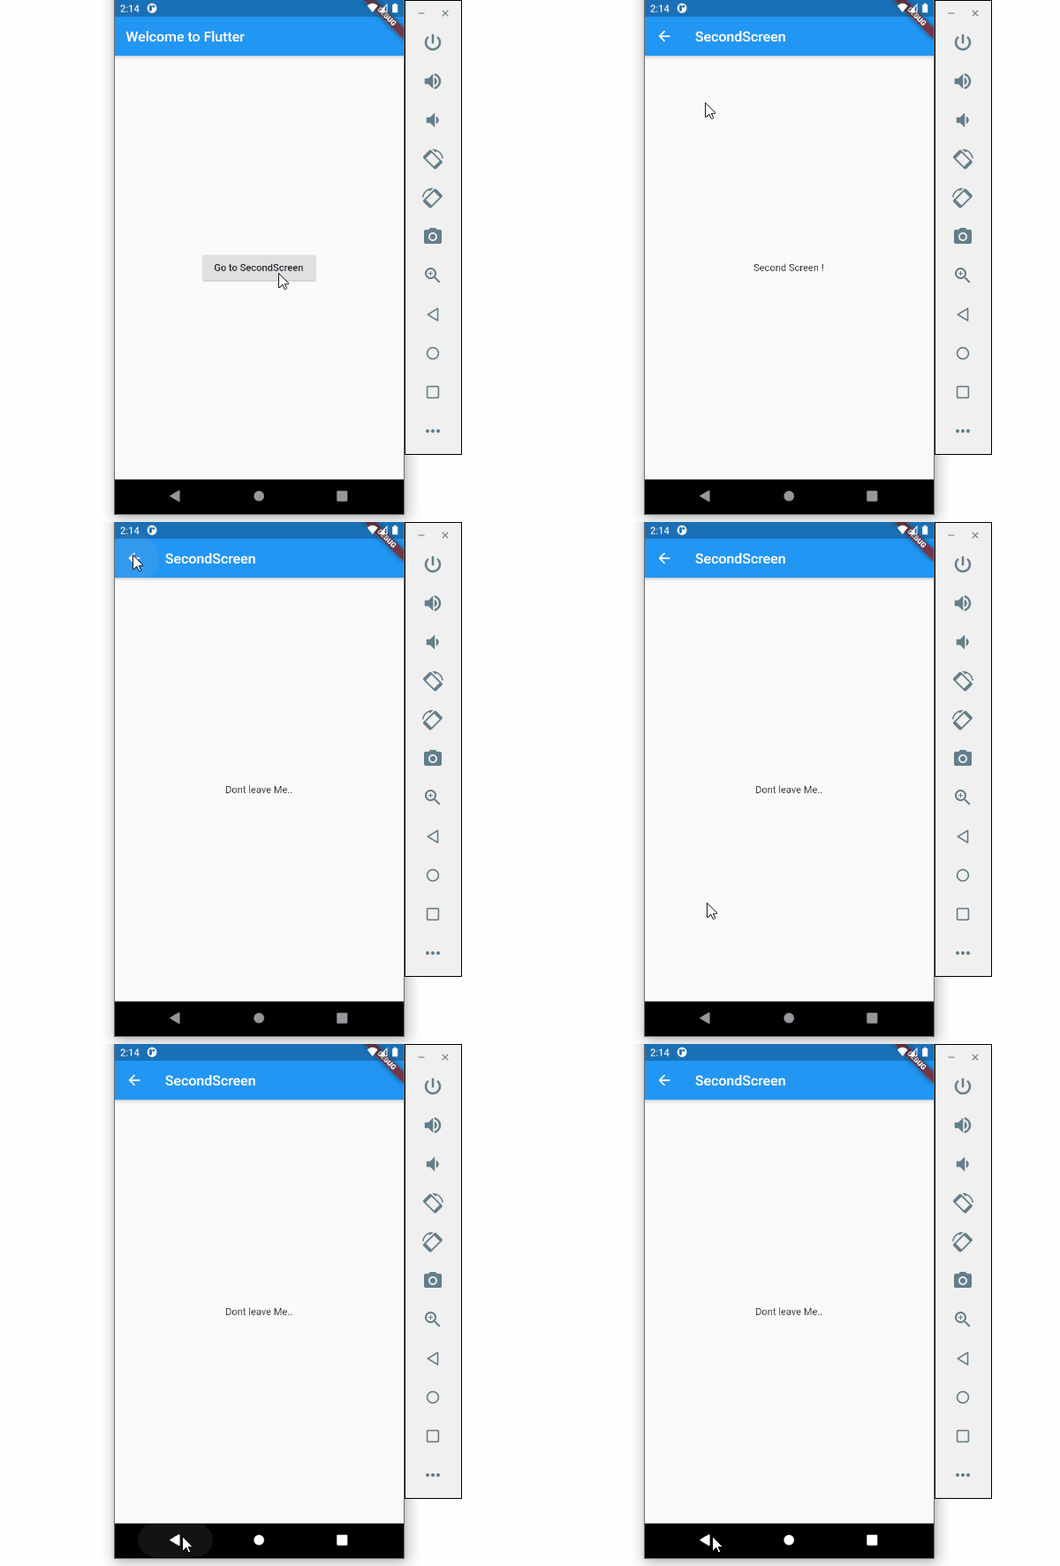
하지만 WillPopScope를 Navigator Push 상태에서 사용한다면 AppBar의 뒤로 가기 버튼도 안된다..

import 'package:flutter/material.dart';

void main() => runApp(
      MaterialApp(
        title: 'MyApp',
        home: MyApp(),
      ),
    );

class MyApp extends StatefulWidget {
  @override
  _MyApp createState() => _MyApp();
}

class _MyApp extends State<MyApp> {
  @override
  Widget build(BuildContext context) {
    return WillPopScope(
      child: Scaffold(
        appBar: AppBar(
          title: Text('Welcome to Flutter'),
        ),
        body: Center(
          child: RaisedButton(
            onPressed: () {
              Navigator.push(context,
                  MaterialPageRoute(builder: (context) => SecondScreen()));
            },
            child: Text("Go to SecondScreen"),
          ),
        ),
      ),
      onWillPop: () {},
    );
  }
}

class SecondScreen extends StatefulWidget {
  @override
  _SecondScreen createState() => _SecondScreen();
}

class _SecondScreen extends State<SecondScreen> {
  String _text = "Second Screen !";
  @override
  Widget build(BuildContext context) {
    return WillPopScope(
      child: Scaffold(
        appBar: AppBar(title: Text('SecondScreen')),
        body: Center(
          child: Text(_text),
        ),
      ),
      onWillPop: () {
        setState(() {
          _text = "Dont leave Me..";
        });
      },
    );
  }
}
Navigator가 궁금하다면 아래의 포스팅을 참고하자 !
[Flutter] Navigator & Named Route "화면 전환의 시작"
[Flutter] Navigator & Named Route"화면 전환의 시작"
[Flutter] Navigator는 앱 화면 간 이동을 구현할 때 사용한다. Navigator는 스택 개념으로 작동을 한다. 즉 Last In First Out 특징을 갖고 있는데, 만약 first screen, second screen, third screen 3개의 화면..
security-nanglam.tistory.com
이 문제를 해결하는 방법은 AppBar의 뒤로가기 버튼을 새롭게 만드는 방법이다.
AppBar의 구조를 모른다면 아래의 포스팅을 참고하자..
[Flutter] AppBar?! AppBar의 "모든 것"
[Flutter] AppBar?! AppBar의 "모든 것"
[Flutter] import 'package:flutter/material.dart'; void main() => runApp(MyApp()); class MyApp extends StatelessWidget { @override Widget build(BuildContext context) { return MaterialApp( title: 'We..
security-nanglam.tistory.com

import 'package:flutter/material.dart';

void main() => runApp(
      MaterialApp(
        title: 'MyApp',
        home: MyApp(),
      ),
    );

class MyApp extends StatefulWidget {
  @override
  _MyApp createState() => _MyApp();
}

class _MyApp extends State<MyApp> {
  @override
  Widget build(BuildContext context) {
    return WillPopScope(
      child: Scaffold(
        appBar: AppBar(
          title: Text('Welcome to Flutter'),
        ),
        body: Center(
          child: RaisedButton(
            onPressed: () {
              Navigator.push(context,
                  MaterialPageRoute(builder: (context) => SecondScreen()));
            },
            child: Text("Go to SecondScreen"),
          ),
        ),
      ),
      onWillPop: () {},
    );
  }
}

class SecondScreen extends StatefulWidget {
  @override
  _SecondScreen createState() => _SecondScreen();
}

class _SecondScreen extends State<SecondScreen> {
  String _text = "Second Screen !";
  @override
  Widget build(BuildContext context) {
    return WillPopScope(
      child: Scaffold(
        appBar: AppBar(
            leading: IconButton(
              icon: Icon(Icons.arrow_back_ios),
              onPressed: () {
                Navigator.pop(context);
              },
            ),
            title: Text('SecondScreen')),
        body: Center(
          child: Text(_text),
        ),
      ),
      onWillPop: () {
        setState(() {
          _text = "Dont leave Me..";
        });
      },
    );
  }
}
Icon 모양을 arrow_back_ios로 하면 기존 AppBar의 뒤로가기 버튼과 비슷하게 꾸밀 수 있다.


댓글